Integrate your e-commerce with Skicka Direkt Business
Find an integration that works for you
Skicka Direkt Business connects to your online store via a partner integration. Our partners have built integrations to some of the most popular e-commerce platforms, and can help you get set up. All integrations labelled "Portal Integration" connect to Skicka Direkt Business and use the setup process described in this guide.
Can't find a compatible integration?
Our partners have developed integrations that use other interfaces than Skicka Direkt Business for managing label printing.
How it works
Once set up, a store connection to Skicka Direkt Business will:
Populate your checkout with shipping options that are always up-to-date - configured by you
Automatically create a correct shipping order every time a customer completes the purchase flow in your checkout
Create a shipping label inside Skicka Direkt Business for you to print during packing
1 - Set up your store connection
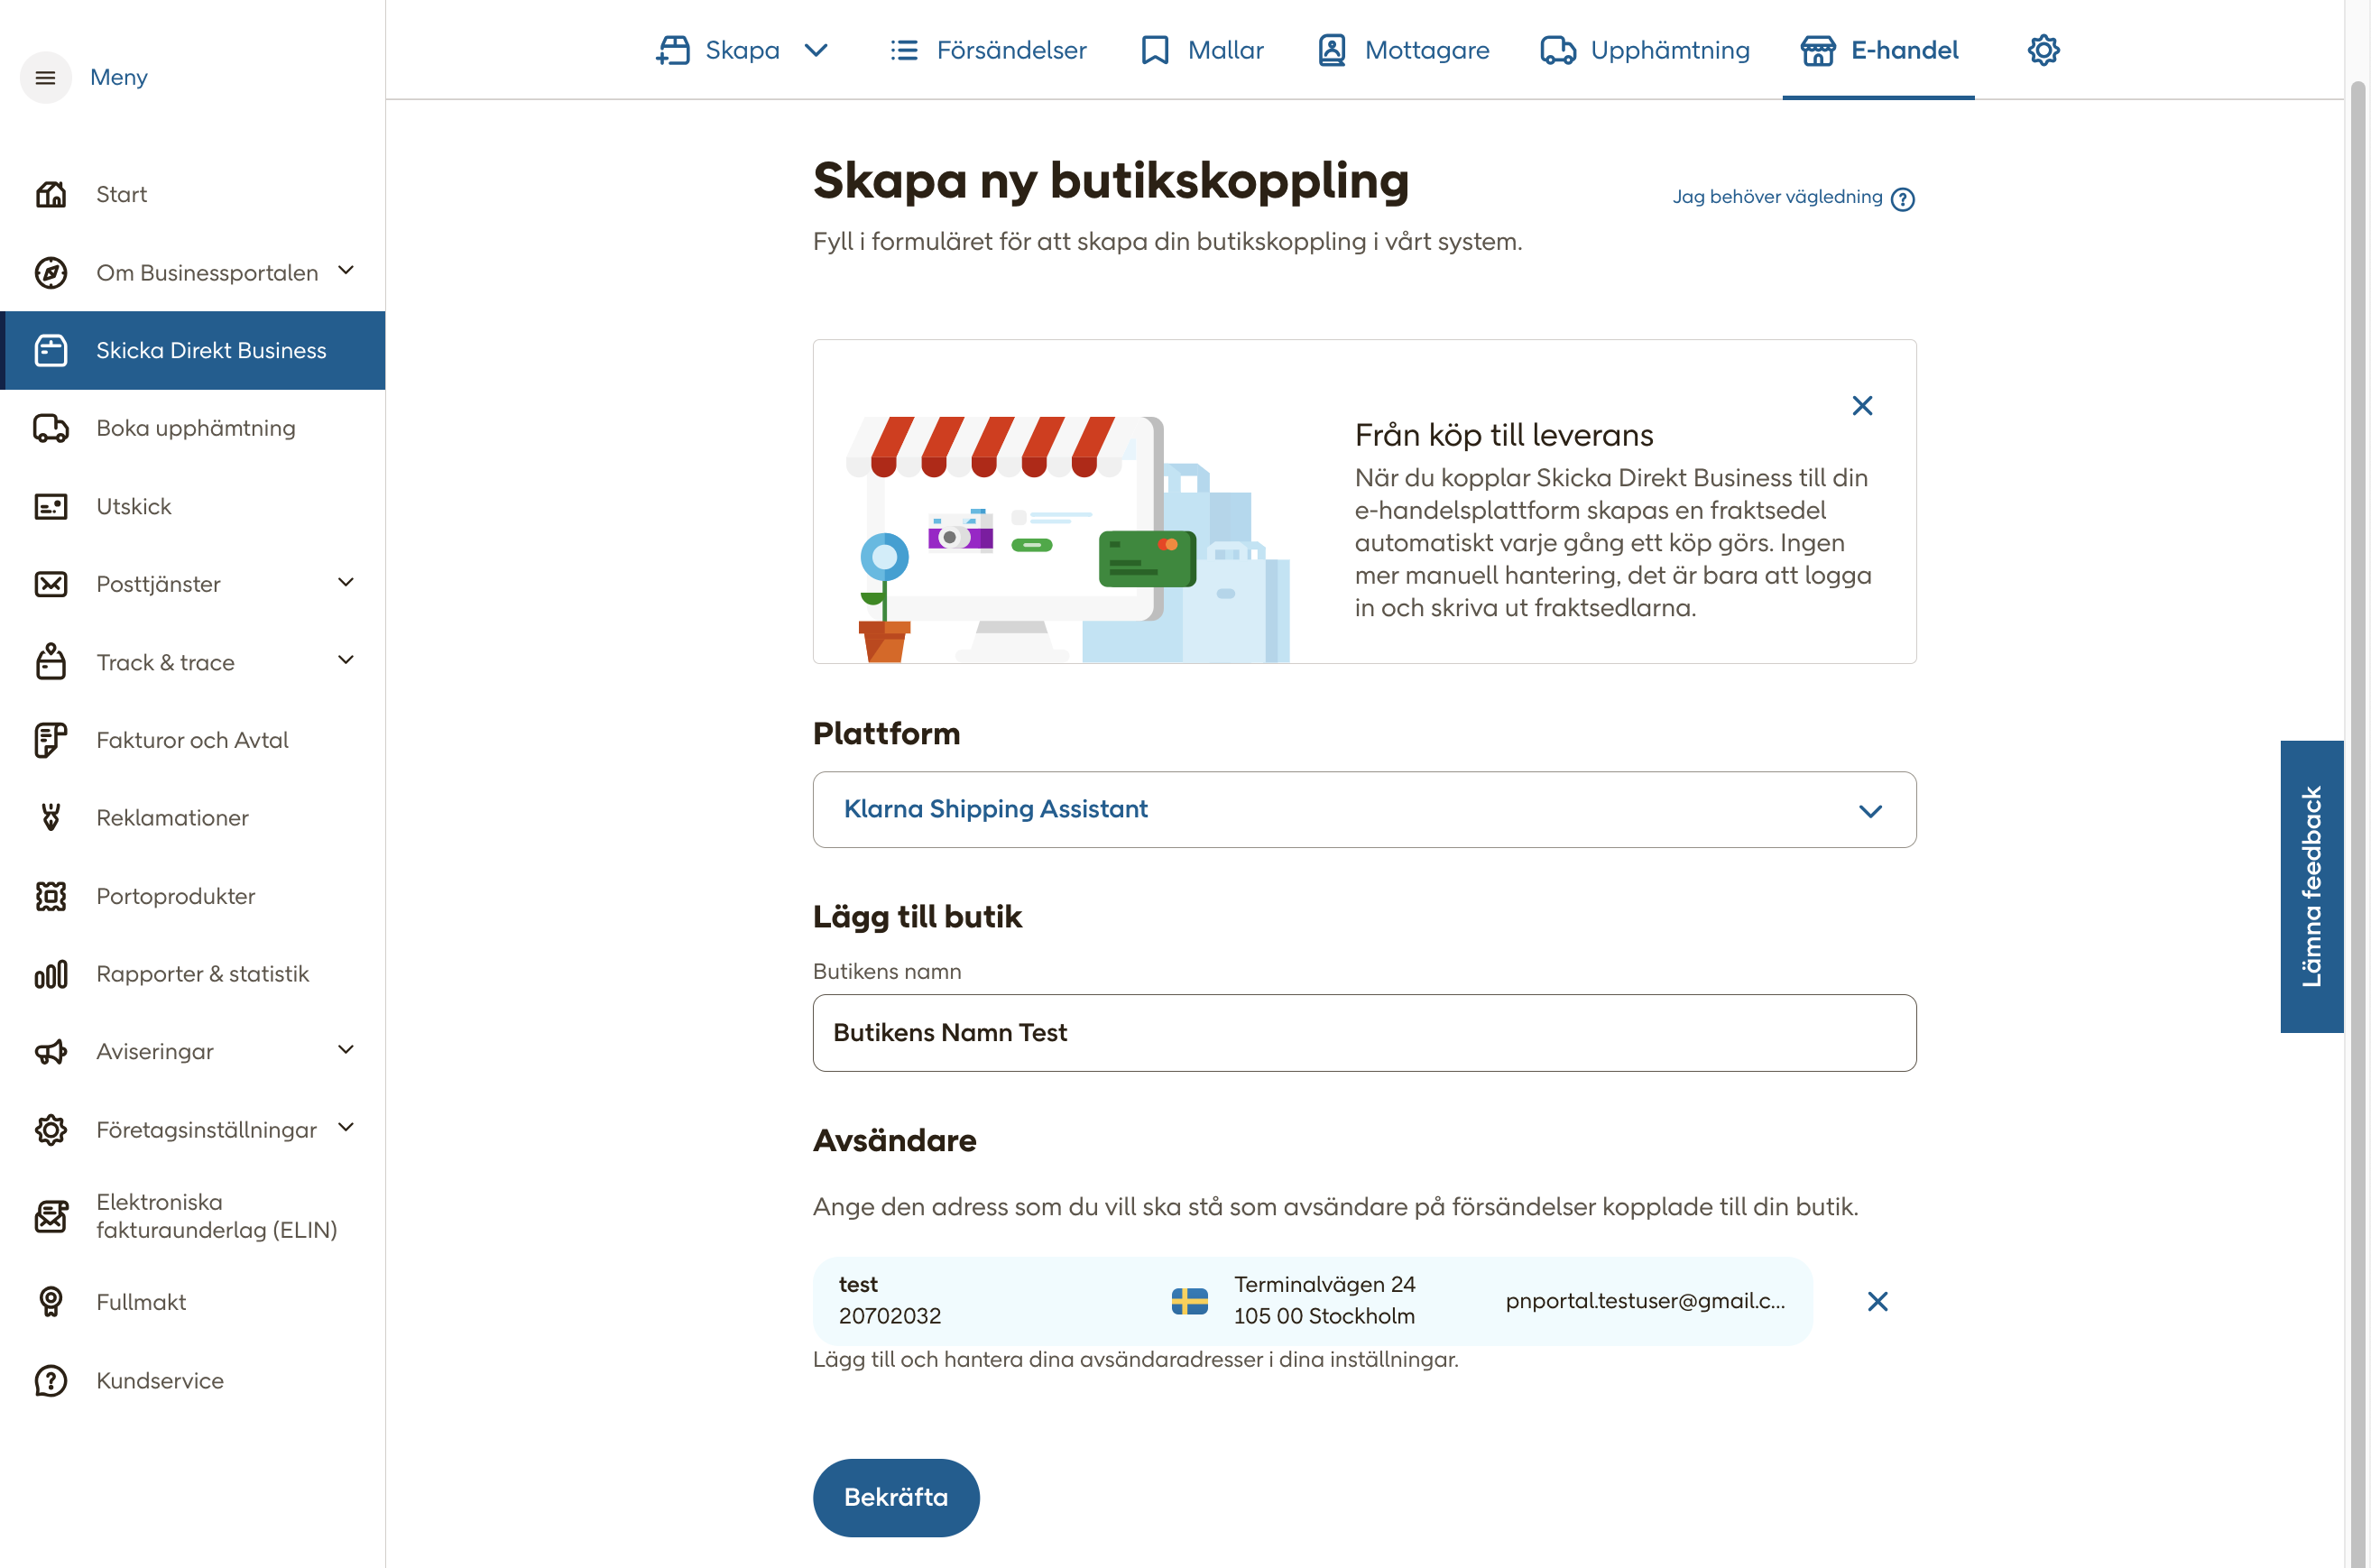
Go to Skicka Direkt Business in the Portal menu. Click the E-commerce tab at the top of the page.
Click "Create a new store connection" and select the integration partner you want to integrate with.
Name your store - this will only be visible to you and is useful if you have multiple online stores.
Select the sender address that will appear on all the created waybills. See the guide for Skicka Direkt Business on how to create sender addresses.
You will now be provided with a secret key which will be used to complete your setup.
Save this key in a secure way in case you need it in the future - otherwise you may need to repeat this procedure if anything goes wrong.
Establish the connection inside your integration's configuration interface
Depending on which integration you have chose, your configuration interface will be inside the connected e-Commerce itself or inside the plugin provided by the partner. Contact your the partner providing the integration for more details on how to complete the integration setup.
Go to the configuration interface for your integration and enter the secret key to establish the connection between your e-commerce platform and Skicka Direkt Business.
2 - Configure your delivery options
Now we will create the delivery options that should be visible to your customer in your check-out.
Open your store connection inside the e-commerce tab and Click Add Shipping Service.
Choose between different delivery methods and in each delivery method there are different services that you can use. Add as many services as you think should be visible to your customer as possible choices - we will add conditions in later steps.
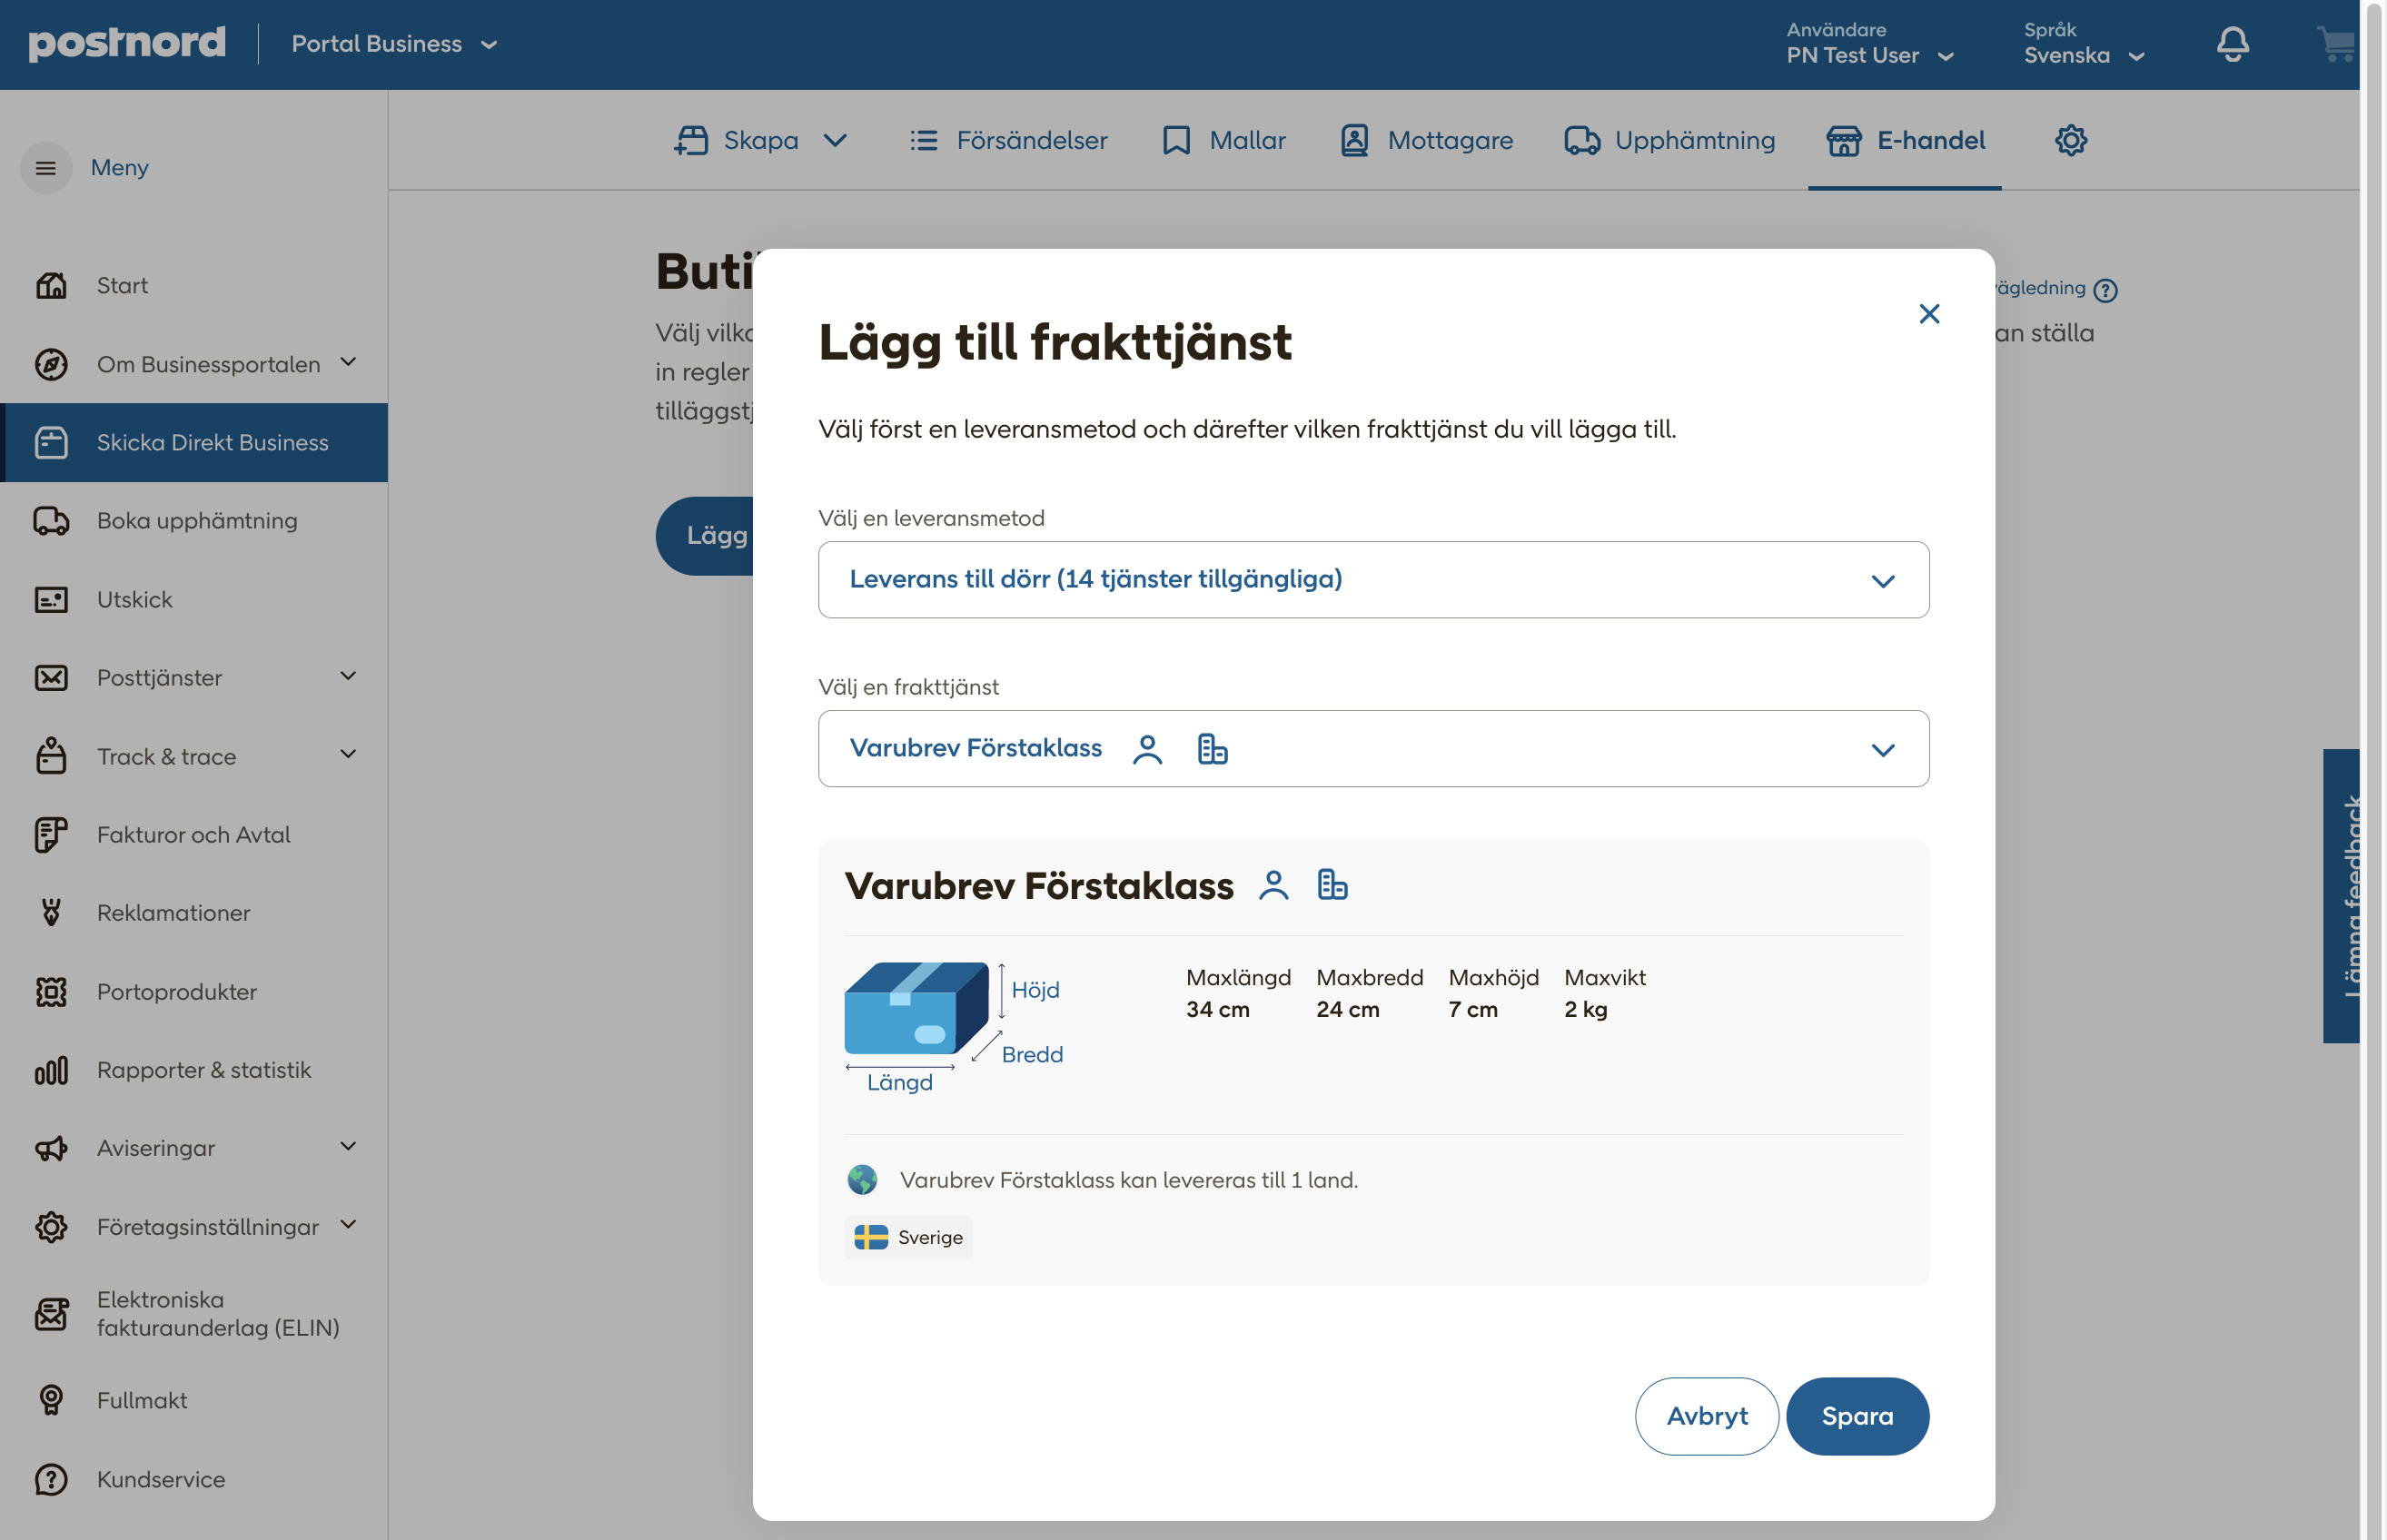
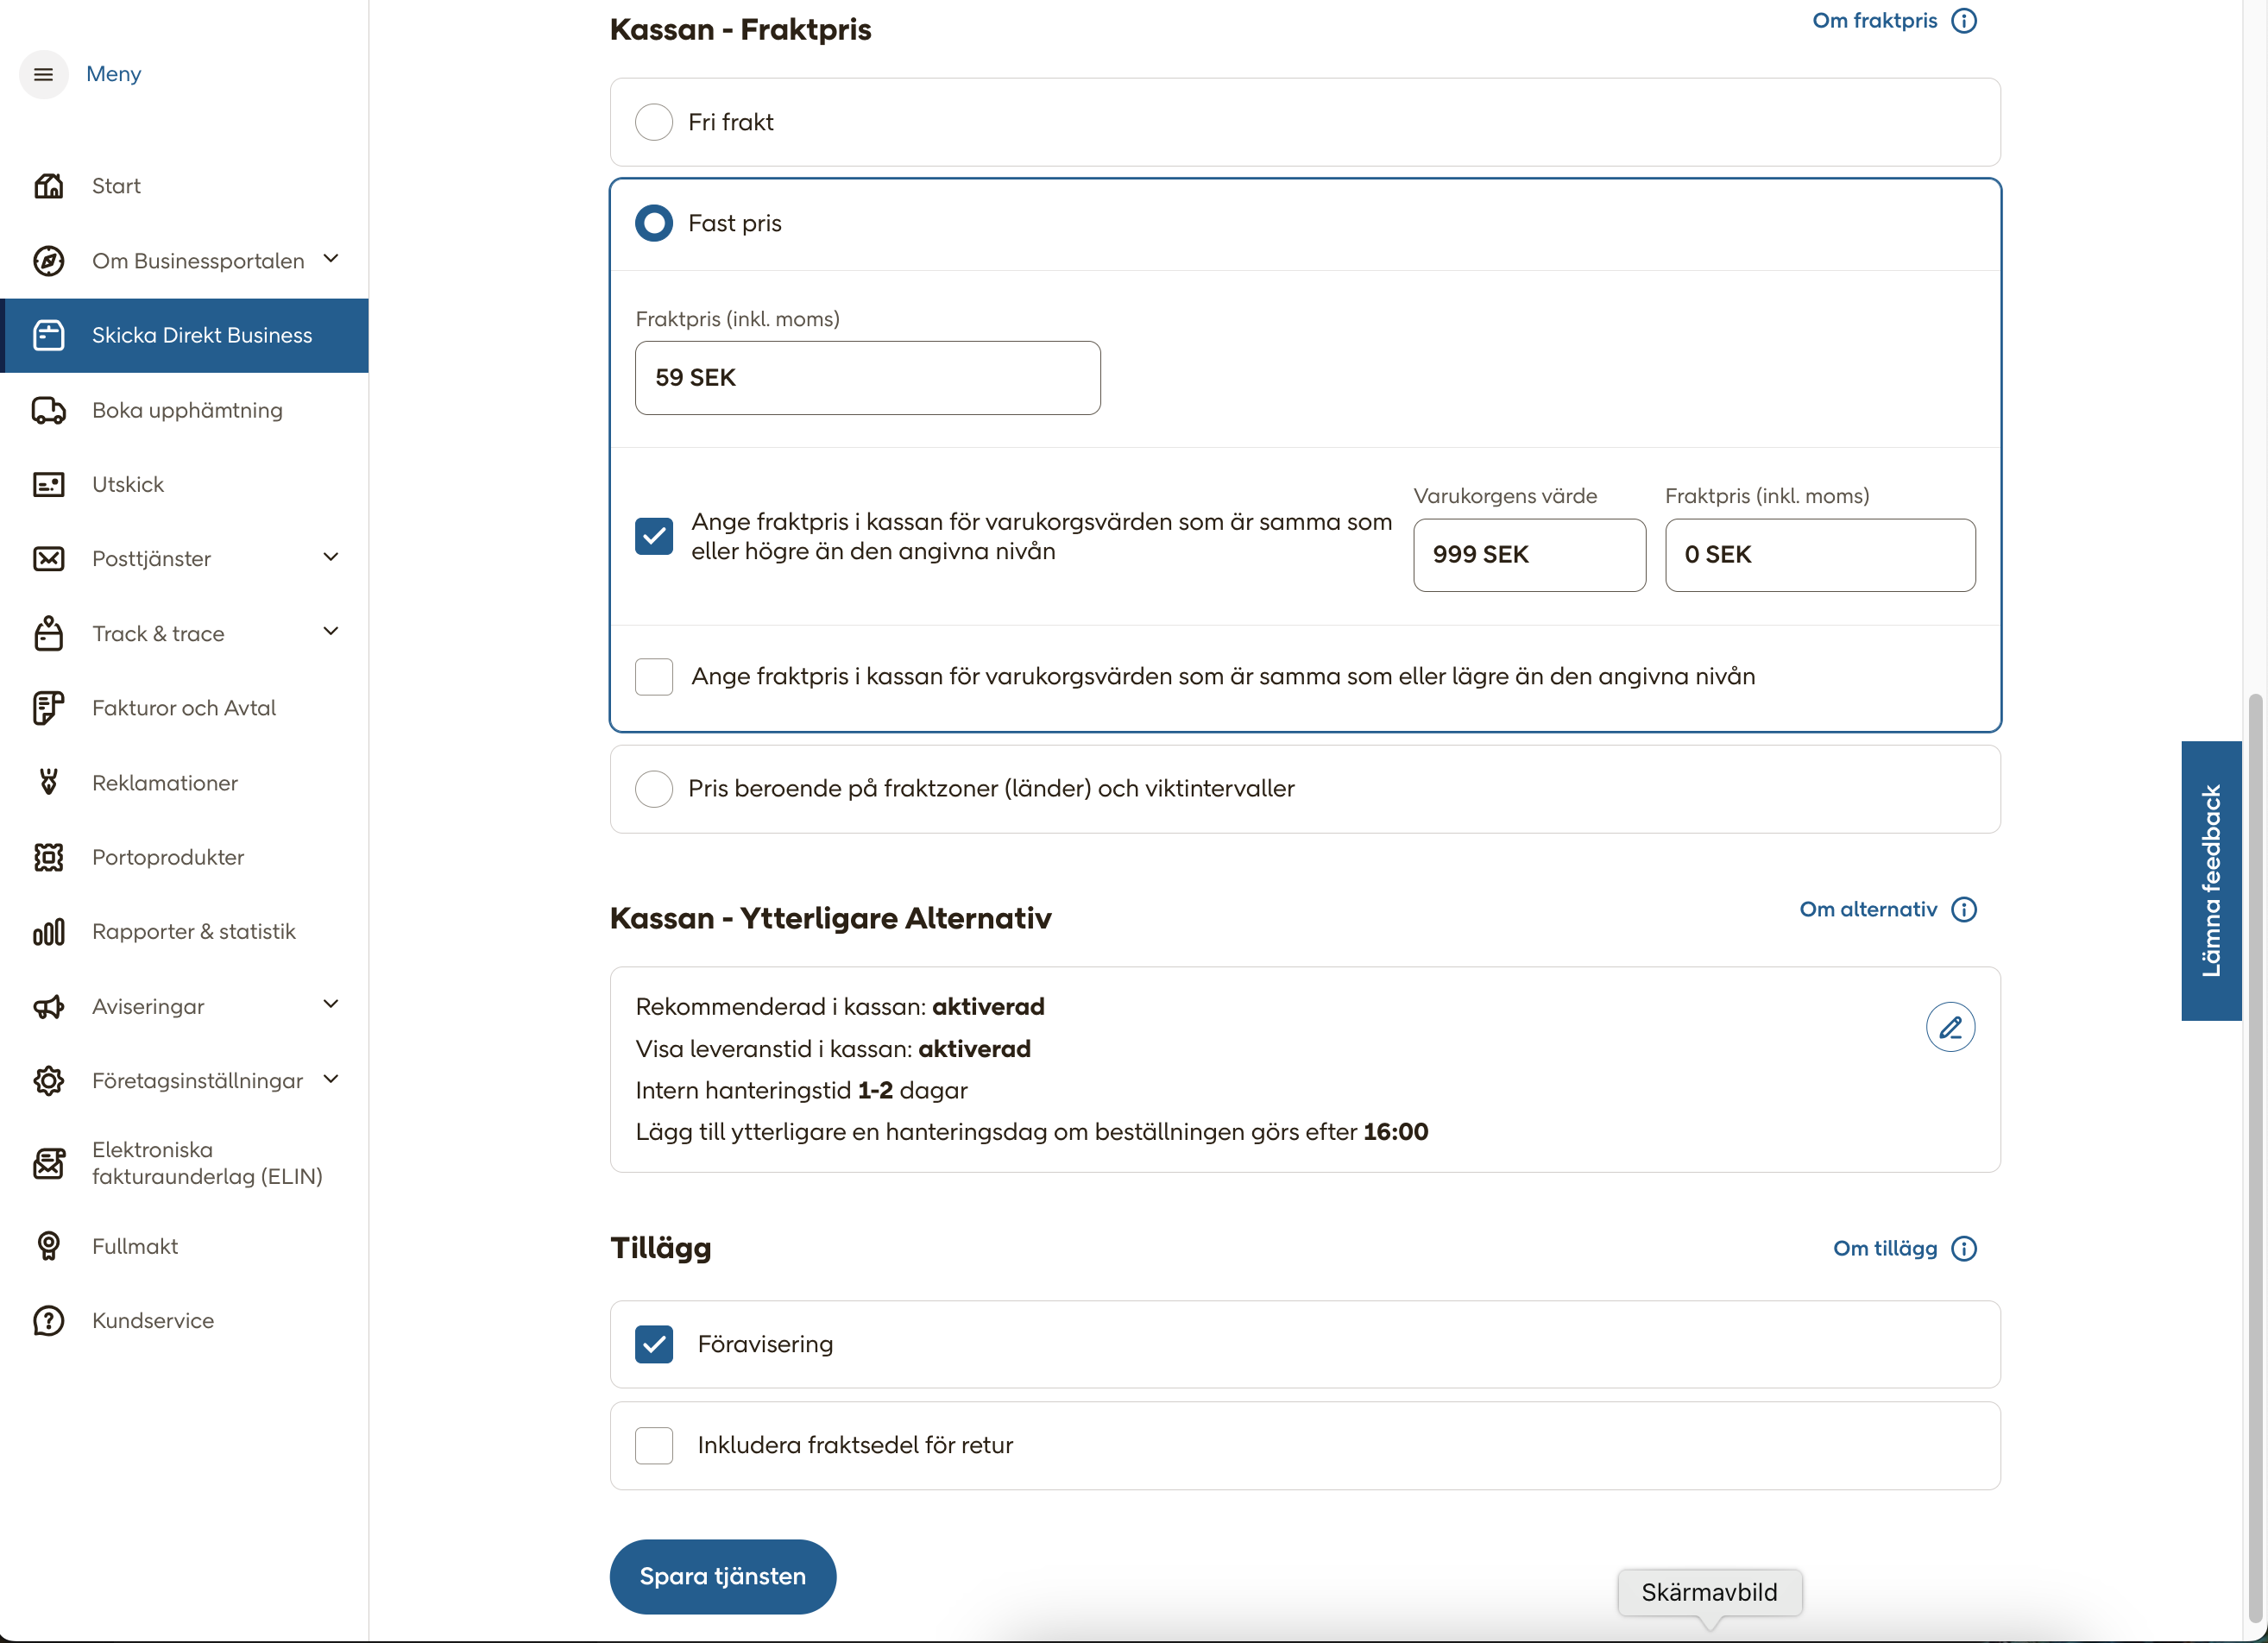
In each service you add, you must decide any price you want to charge your customers and/or if you want to offer free shipping or free shipping above a certain amount. You can also offer different shipping costs depending on country and/or weight.
Don't forget to add additional options or additional services if necessary.
Test your connection
If possible, set up a test environment for your online store to test your checkout and the configured delivery options. Completing the checkout flow should generate a shipping order which you can print from Skicka Direkt Business.
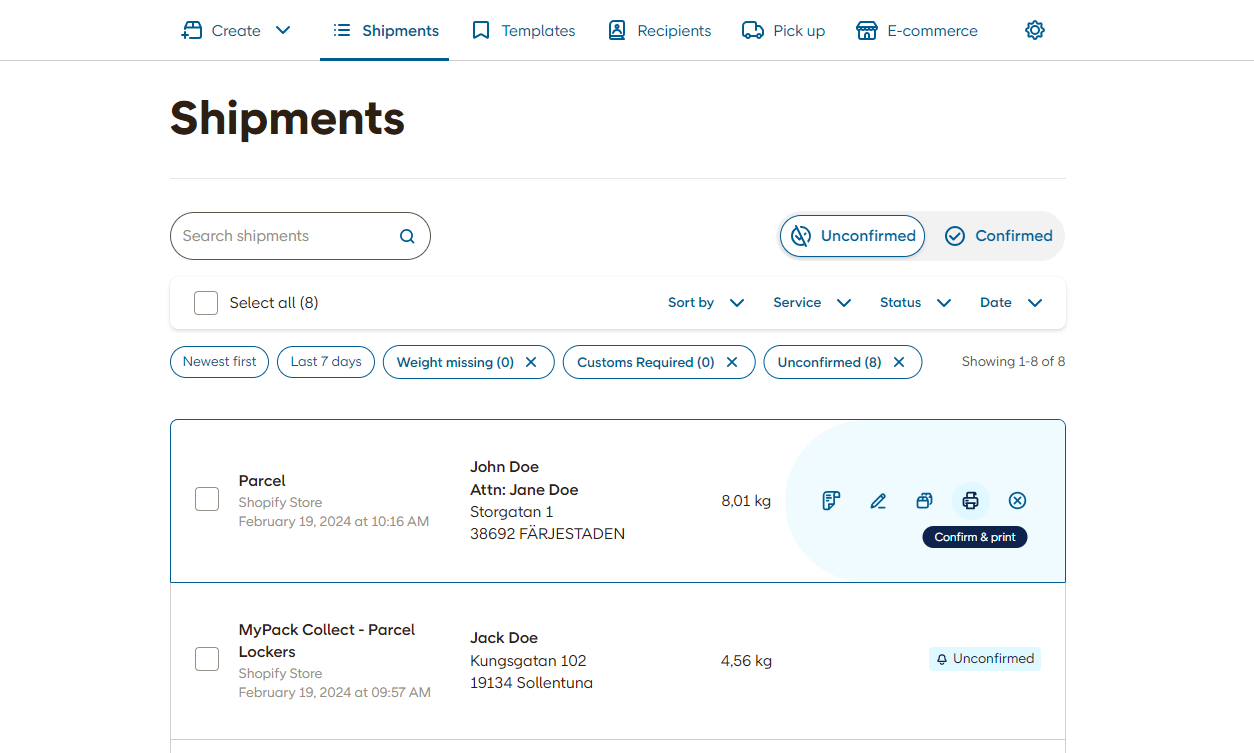
3 - Confirm and print your labels
Once set up, your checkout should now display the shipping options you have configured.
Finalizing a purchase will now create a shipping label in Skicka Direkt Business, under the tab "Shipments" > "Unconfirmed" here you can go through the order to see that everything looks correct, and then confirm and print the shipping label.